Startup Faster with Startup Delayer


By now, most of you have heard about editing your startup options via msconfig, but that process involves checking or unchecking programs from running at startup altogether.

However, you might have quite a few programs that you do need to run, like your online backup or your anti-virus auto-updating program. Unfortunately, some of these programs can take a lot of time to start up when you first turn on your computer. This is where Startup Delayer can help.

Startup Delayer takes a different approach than msconfig. Like msconfig, you can use the program to enable and disable programs from running, but you can also use it to have programs run after startup at a designated time, by customizing the intervals at which they begin to run.

To do so, you just go into Startup Delayer's options and specify how many seconds after Windows has started up before running each program.

Startup Delayer is free and can be downloaded from here.

AVG 8.0 Free Version, includes Anti-Spyware

avg_logoBack in February, Grisoft released AVG 8.0 Professional which included anti-rookit and anti-spyware along with virus protection. I was a little disappointed because AVG 8.0 wasn't available in free edition, and I was curiously waiting my favorite anti-virus to get a facelift. Yesterday, Grisoft released the free edition of AVG 8.0, which offers basic anti-virus protection for Windows XP and Vista.

Along with the new improved interface, AVG 8.0 Free can also bash spywares/adwares and includes basic LinkScanner for Safe Search.

I've been using AVG for over year now, and I'd definitely recommend it to anyone who is looking for free anti-virus protection. It's one of the best rated anti-virus suites available for Windows.

Download AVG 8.0 Free

Windows XP Service Pack 3 Build 5512 Final *Official*

Windows XP Service Pack 3 (SP3) includes all previously released updates for the operating system. This update also includes a small number of new functionalities, which do not significantly change customers' experience with the operating system.

Make Adobe Reader Faster with Adobe Reader SpeedUp

Adobe reader is the most popular freeware to open .PDF files. The problem with Adobe Reader is it takes up lot of memory and slow to open. Adobe Reader SpeedUp is a free Windows utility that disables various features of Adobe PDF Reader to improve performance and decrease memory usage. This plugin can be freely enabled and disabled, if required.

arsu_main

Adobe Reader Speed-Up has been created as an effort to automate the process of speeding up Adobe Reader's launch time by disabling the majority of plugins that are completely useless for most users.

To remove Adobe Reader Speed-Up from your system, simply quit the application and delete its directory.

Requirements: VB Runtime

Download Adobe Reader Speedup

How to Import and Export Firefox Passwords

Its definitely hard to remember the usernames and passwords for all the websites that we visit daily. The benefit of using a smart browser like Firefox is that it saves the login credentials within the Firefox password manager and retrieves them automatically when you visit a particular website thus allowing you to access it.

But what if you want to print out that login credentials list for future reference or want to save it as a document list somewhere within your operating system. Password Export, a Firefox addon, is there to help you in this regard.

This Firefox addon will let you export a CSV/XML formatted list of all the login credentials stored within the Firefox password manager. This list will have the usernames, passwords, emails and URLs of all the sites that you have ever logged into through Firefox.

Not only can you export the list but you can also import it on another PC or operating system (e.g. Ubuntu) so that you don't have to enter your login credentials again and again when you visit known websites daily.

Password Exporter can be installed from the link below:

https://addons.mozilla.org/en-US/firefox/addon/2848

Supercopier

The default Windows Explorer file copy function does not have features like resuming copy, controlling speed etc. SuperCopier is a replacement for Windows Explorer's copy functionality. SuperCopier replaces Windows Explorer file copy and adds many features. These include transfer resuming, copy speed computation and control, improved copy progress display, copy list editable while copying, copy list saving/loading, and an error log.

69479f

The feature I liked most is the transfer resume functionality which is much needed in Windows Explorer.

SuperCopier is still in beta and a freeware, but not supported by Vista.

Download SuperCopier

Spyware Doctor 5.5 for Free

Spyware Doctor is one of the best security products of PC Tools that has been striving hard to keep the PCs of users safe from Spyware and Adware. Spyware Doctor also received the PC World's Best Buy award in October 2007 and several Editors' Choice awards from PC Magazine.

Spyware Doctor has the most advanced update feature that continually improves its Spyware fighting capabilities on daily basis. As Spyware gets more complex to avoid detection by AntiSpyware programs Spyware Doctor responds with new technology to stay one step ahead.

Apart from all the great features that Spyware Doctor provides, it also has a real-time Computer Immunization technology and OnGuard protection that makes sure that Sptware is immunized as soon as it is discovered.

  • Spyware Doctor 5.5 with Antivirus Starter Edition (Download)
  • Spyware Doctor 5.5 Starter Edition (Download)

Google Email Uploader

The Google Email Uploader is a desktop utility for Microsoft Windows that uploads email and contacts from other desktop email programs (like Microsoft Outlook) into your Google Apps mailbox. The Email Uploader preserves information such as sent dates and sender/recipient data, as well as the folder structure used by the other email program. The Google Email Uploader requires a Google Apps account.
The Email Uploader is Apache 2.0 licensed open source software, and is governed by the terms of the included license file. This means you may modify the tool to better suit your needs


Recover Files v2.1

138057_large

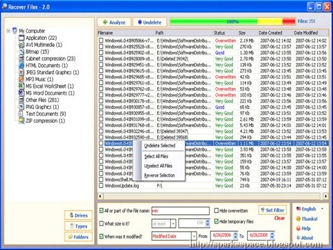
Recover Files is a professional file recovery software that allows it's user to recover accidentally deleted files. Even files removed from the Recycle Bin, network drive, compact flash card, portable devices, in a DOS window, or from Windows Explorer with the SHIFT key held down. Recover Files is a small, fast, useful, practical and powerful. It has a clean, simple interface.

It can be used to recover deleted files from all NTFS and FAT partitions. The program supports all Windows file systems for hard and floppy drives including FAT12/16/32, NTFS/NTFS5 and image recovery from CompactFlash, SmartMedia, MultiMedia and Secure Digital cards. Recover Files quickly and effectively restore all those files that you may have deleted by mistake.

System Req:Windows 95/98/Me/NT/2000/XP/2003 Server/Vista

HomePage RecoverFiles

Amic Email Backup

Emails normally contain a wealth of information that are valuable to most users. They can contain account details, important conversations or files and it would be a catastrophe - at least for me - if I would not be able to recover my emails in case of a computer crash. The natural consequence for me is that I create regular backups of my email accounts which are stored on an external hard drive and backup DVD.

I do use MozBackup to backup the data in Thunderbird regularly but what if you use another client ? Amic Email Backup can create backups of the data of nine popular email clients including Microsoft Outlook, Microsoft outlook Express, Opera Mail, Pegasus Mail and The Bat. The user can choose the identities, some would call it profiles, and the data that should be backed up from those profiles. By default everything is selected which means backups are created of account settings, mail folders, message rules, signatures, address books and stationery.

Backups can be password protected for increased security and scheduled so that they are created on a regular basis. It is also possible to define the amount of backups that you want to keep which would mean that older backups will be deleted eventually. Backups that are to large can be split so that they fit on a floppy disk, zip drive or CD.

email backup

The restore function can be used to restore the email account on another computer as well which is great if you have purchased a new computer or want to migrate your emails to another one. I'm not sure if the backups are compressed at all because I lack a mail program that is supported by Amic Email Backup

How-to: Schedule your backup or sync programs to run when Vista is idle

TaskcreateBacking up your computer is important, but it can be a hassle. If we have to do it manually, chances are that we will forget one time or another. On the other hand, if we set it up to run automatically to a schedule, we may find it interferes with our normal computer usage.

Vista task scheduler is a very powerful tool. We can set it up to run programs only if the computer is idle. This serves two purposes. The backups will be made automatically and the backups will not interfere with your normal usage.

A huge added bonus is that we can use any backup program we like. We are not limited to backup programs that have scheduling built in. All we need is a backup program that can start backing up as soon as it is launched, which just about all of them can do.

This article is specifically for Windows Vista. XP's scheduled tasks does not have the idle features built in, though it may be able to be achieved with a third party program.

Setup your backup/sync program:

The first step is to set up your backup program so that it can be launched from a shortcut or the command line. Launching it should launch the sync or backup.

You will need to look up these instructions for your individual program to figure out how to make this happen. The information should be readily available for any backup utility that is well known. What good is a sync or backup program that is too complicated to use?

Setting up Task Scheduler:

Open "Task Scheduler" (inside accessories of the start menu)
Click "Create New Task" (not basic)
Give it a name "Backup or Sync"
Go to the "Triggers" tab
Click "New" (defaults to schedule)
Enter the frequency and time you want your backup/sync to occur(I recommend to do it hourly as it will not run if you are by your computer)
Click "OK"
Go to the "Actions" tab
Click "New" (defaults to run program)
Browse for your program and put in the necessary arguments; E.g. -run
Click "OK"
Go to the "Conditions" tab
Here, define how long you want the computer to be idle before activating the backup/sync.
Click "OK"

You have now configured all the basics. There are many other options you can change to suit your needs, but they go beyond what is required to sync or backup.

Conclusion:

As you can see, this is very easy to setup. Gone are the days of manually starting your backups or syncing. When your hard drive crashes, you can be calm, knowing that your important information is tucked away somewhere safe.

I hope you have enjoyed this article and found it useful. For more effort saving types check out some other articles at Inspect My Gadget.


Increase Your Hard Drive Performance

Windows Vista certainly takes a lot of system resources and we need to squeeze out all the performance we can! Here is a quick tip on how to increase the performance of any hard drive internal or external.

Double click My Computer and right click on the drive you want to perform better and select Properties.

1

The Disk Properties box will open. Click on the Hardware tab and then the Properties button.

1

Finally, mark Optimize for performance and place a check next to Enable advanced performance. Click OK and close out of the rest of the windows.

1

How to transfer files and settings with Windows Easy Transfer

There is no need for you to reinstall every single program when you purchase a new computer or when you format your hard disk. Windows Vista provides us with Easy Transfer, a utility that can easily transfer and restore your old settings.

What can you transfer

Easy Transfer will transfer files and settings for the following: e-mail, music, pictures and videos, user accounts, internet and favorites, programs, contacts and messages. Easy Transfer will not transfer your program files, instead it will restore the application’s settings.

Note: in order to transfer files and settings from or to an Windows XP computer, you need to install Easy Transfer (Windows Easy Transfer is already installed on Windows Vista). In order to do this, insert your Windwos Vista DVD into your Windows XP computer, select the Transfer files and settings from another computer option and follow the instructions on the screen

Step 1: export your old file and settings

  • To start Windows Easy Transfer, click the Start button and then choose All Programs, Accessories, System Tools, and finally Windows Easy Transfer.
    Note: you should be working on the computer you want to export your settings from.
  • If you have any opened applications, the wizard will ask you to close them; click Close all
  • Select Start a new transfer
  • Select My Old Computer
  • Now you need to figure out which transfer method to use. The following are available:
    1. Network  You can create a local area connection between the two computers and transfer settings from one pc to another.
    2. CDs or DVDs â€" store your files and settings on a CD/DVD.
    3. Easy Transfer Cable â€" This is a special cable which allows you to directly connect the two computers. Remember that this is not a standard USB cable and you have to buy it separately.
    4. Removable media â€" USB flash drives have always been helpful. Just plug in a USB stick and use it to transfer settings.

    Note: In this tutorial we will export our files and settings to a DVD. You can also use this tutorial if you select any of the methods mentioned above â€" the steps are similar.

  • Select Use a CD, DVD, or other removable media
  • Choose CD or DVD
  • Select your DVD drive and click Next (note that you can also use a password so that you are the only one that can import the files and settings)
  • Clicking on Advanced Options will allow you to customize your transfer: Add Files from a specific location without transferring other files from that folder; Add Folders from a specific location along with the files in that folder; Select Drives to add a whole drive with its content; Exclude Folders that you do not wish to transfer.

Step 2: Import files and settings

After you have completed these steps, it is time to restore your old files and settings.

Note: you should be working on the computer you want to import the files and settings in.

  • Start Windows Easy Transfer: click the Start button and then choose All Programs, Accessories, System Tools and Windows Easy Transfer.
  • If you have any opened applications, the wizard will ask you to close them; select Close all
  • Select Continue a transfer in progress
  • Choose No, I hâve copied files and settings to a CD/DVD or other removable media
  • Select on a CD or DVD
  • Select your DVD drive (make sure the DVD you created in the previous steps is in the DVD drive)
  • Select or create a new user name
  • Click on Transfer
  • All your old files and settings are now transferred to your new computer.

Mount an ISO image in Windows Vista

The freeware utility from Microsoft to mount ISO Images doesn't work in Windows Vista. Thankfully there's another utility that does.

The utility that we will use is called Virtual Clone Drive. This utility will let you mount .ISO, .CCD, .DVD, .IMG, .UDF and .BIN files. Download the utility and start the setup process.

Select Yes or OK at the hardware prompt and continue. You might have to restart your computer. Now you should be able to mount any ISO image by just double-clicking on the file. Note: If you are going to reinstall this utility, make sure you uninstall it first, or you'll BSOD yourself repeatedly.

This utility does not work on Windows Vista 64 bit edition.